Easiest Hiking Trails in Grand Canyon South Rim: A Beginner’s Guide
- Discovering the Most Accessible Trails at the South Rim
- How to Choose an Easy Trail: Factors for New Hikers
- Short, Flat Trails with Iconic Views
- Kid-Friendly Trails and Family Activity Spots
- What to Expect on the Rim Trail: Scenic Simplicity for Beginners
- Planning Around the Weather: Best Times for Comfortable Hiking
- Shuttle Stops and Trail Access: Navigating the South Rim with Ease
- Sunrise and Sunset Hikes: Easy Trails with Maximum Reward
- Avoiding Crowds on Easy South Rim Trails
- How Elevation Affects Beginner Hikes
- Are South Rim Easy Trails Safe for Solo Hikers?
- Where to Start: Visitor Centers and Trailhead Orientation
- Combining Easy Hiking with Scenic Drives
- Accessibility and Wheelchair-Friendly Trail Options
- What to Pack for a Short, Easy Day Hike
- Why Start with Easy Trails Before Exploring Deeper
- Frequently Asked Questions (FAQ)
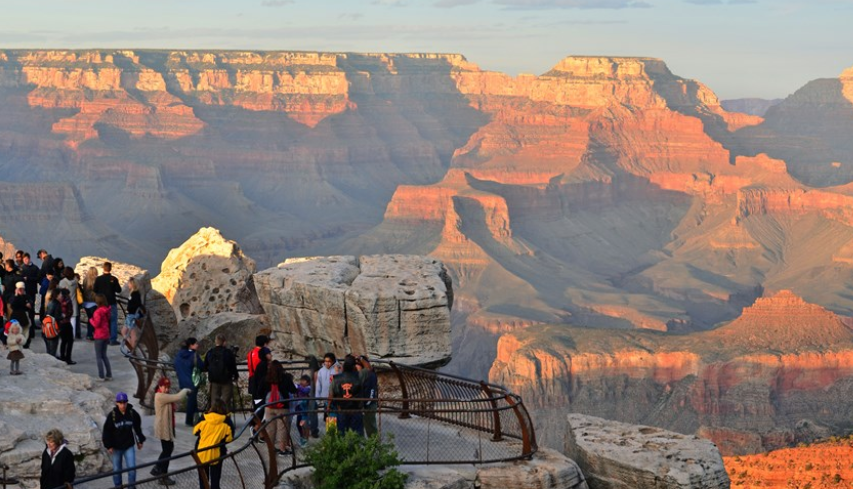
Discovering the Most Accessible Trails at the South Rim
For first‑time visitors seeking easy and scenic hikes, the South Rim offers several trail options that are both manageable and rewarding. The Rim Trail spans from the Visitor Center east toward Hermit’s Rest, providing gentle walking on mostly paved or well-maintained dirt paths. It features interpretive signs and overlooks every few hundred feet. Similarly, the Trail of Time, an educational portion of the Rim Trail, provides insight into the canyon’s geology with minimal effort, making it ideal for families or those who prefer a relaxed pace. These trails require little elevation change and can be done at your own pace, giving excellent views without the strain of descending into the canyon.
How to Choose an Easy Trail: Factors for New Hikers
| Factor | Why It Matters | What to Look For |
| Trail Surface | Determines stability and footing | Prefer paved or compacted gravel trails |
| Elevation Change | Impacts exertion level | Choose trails with minimal slope and no steep inclines |
| Proximity to Amenities | Ensures easy access to rest and water | Trails close to restrooms or shuttle stops |
| Shade & Exposure | Affects comfort in sun and temperature | Trees or rock formations that offer relief |
Understanding these factors helps you pick the right trail for your fitness level and interests. Many hikers appreciate starting with these beginner routes before attempting tougher paths like Angels Landing, learning from articles such as is it safe to hike angels landing alone.
Short, Flat Trails with Iconic Views
One of the most rewarding easy hikes is the portion of Rim Trail between Mather Point and Yavapai Point, which stretches for about two miles one-way. This segment offers iconic vistas with little elevation change. Another accessible option is the path from the Village Loop Trailhead near El Tovar Hotel; this flat route runs past Bright Angel Lodge and allows easy rest stops at scenic overlook benches. These trails are well-suited for those seeking memorable views without intense exertion, making them perfect for people acclimating to the park’s elevation and wanting to pace themselves.
Kid-Friendly Trails and Family Activity Spots
Family-friendly hikes at the South Rim often combine accessibility and engagement. The Yavapai Geology Museum path is a short, flat loop that includes interactive exhibits and rest areas—ideal for curious kids. Another great option is the Greenway Trail, which meanders gently through the park’s landscaped areas and connects various viewpoints. Families can easily stop for photos or snacks along this route. Easy walking paths near the Visitor Center and the historic Grand Canyon Railway Depot offer a blend of shade, interpretive signage, and canyon views without demanding terrain, perfect for multi-generational groups. If you enjoy gentle trails here, similar considerations apply when planning more remote or intermediate destinations like how to get to Racetrack Playa in Death Valley —start with the easy routes and gradually build your confidence.
What to Expect on the Rim Trail: Scenic Simplicity for Beginners
The Rim Trail is the most beginner-friendly route in the Grand Canyon South Rim and serves as a perfect introduction to hiking in the park. This trail runs for over 13 miles, but the beauty lies in how flexible it is—you can walk just a short section and still get world-class views. Most segments are flat and well-paved, especially between Mather Point, Verkamp’s Visitor Center, and Hopi Point. Unlike the steep and demanding trails that descend into the canyon, the Rim Trail hugs the edge, offering an accessible way to appreciate the massive scale of the canyon without physical stress.
Along the trail, benches and railings are common, letting you take breaks and soak in the views. Water fountains and restrooms are available at several junctions, and you can always catch a free park shuttle to return to your starting point. This makes the trail perfect for those who want freedom without committing to a long loop or out-and-back hike. Whether you walk 10 minutes or 2 hours, the views never disappoint.
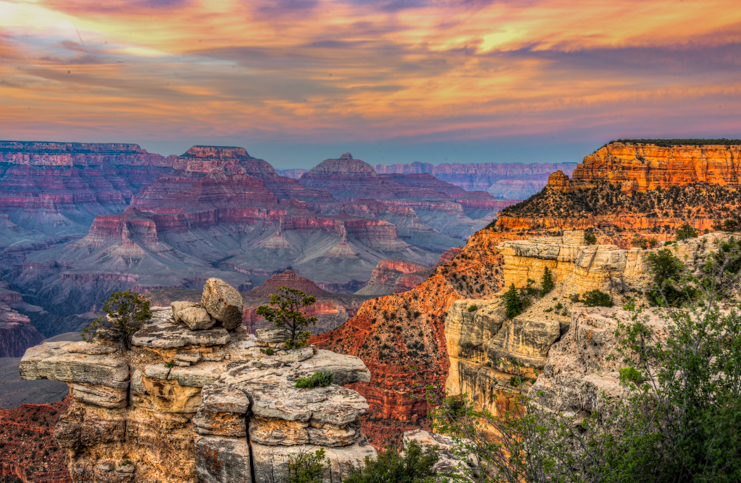
Planning Around the Weather: Best Times for Comfortable Hiking
The South Rim experiences wide temperature swings throughout the year, so choosing the right time of day or season is essential—especially for beginners. In the summer, mid-day temperatures can soar, making even flat trails feel exhausting. During this period, aim for early morning or late afternoon when temperatures are cooler and the lighting makes the canyon colors even more stunning. Spring and fall are the best seasons overall, offering milder temperatures, fewer thunderstorms, and less crowding along easy routes.
Winter is also a surprising option for beginner hiking, provided the trails aren’t icy. Snow along the Rim can make for breathtaking contrast with the red canyon walls. However, you’ll need to wear layers and possibly traction devices for icy patches. Compared to places like Yosemite, which requires careful planning to avoid crowds, Grand Canyon’s South Rim offers beginner hikers more freedom to choose their moment—especially along the more relaxed paths.
Shuttle Stops and Trail Access: Navigating the South Rim with Ease
Getting to your chosen trailhead is half the battle, and luckily, the South Rim has one of the most efficient and beginner-friendly shuttle systems of any national park. These free shuttles operate on a regular schedule and connect major overlooks, trailheads, lodges, and visitor centers. For instance, the Blue Route (Village Route) is perfect for accessing central rim trails like the ones near Bright Angel Lodge, while the Red Route (Hermits Rest Route) gives you access to western Rim Trail segments with more isolated views and less foot traffic.
Shuttle stops are clearly marked, and drivers often share tips or updates about trail conditions. The route maps are color-coded and available at every stop. Many easy hikes can be started at one stop and ended at another, which gives you the freedom to explore without worrying about retracing your steps or overexerting yourself. For first-timers, this convenience is a major part of why the South Rim is such a good entry point to Grand Canyon hiking.
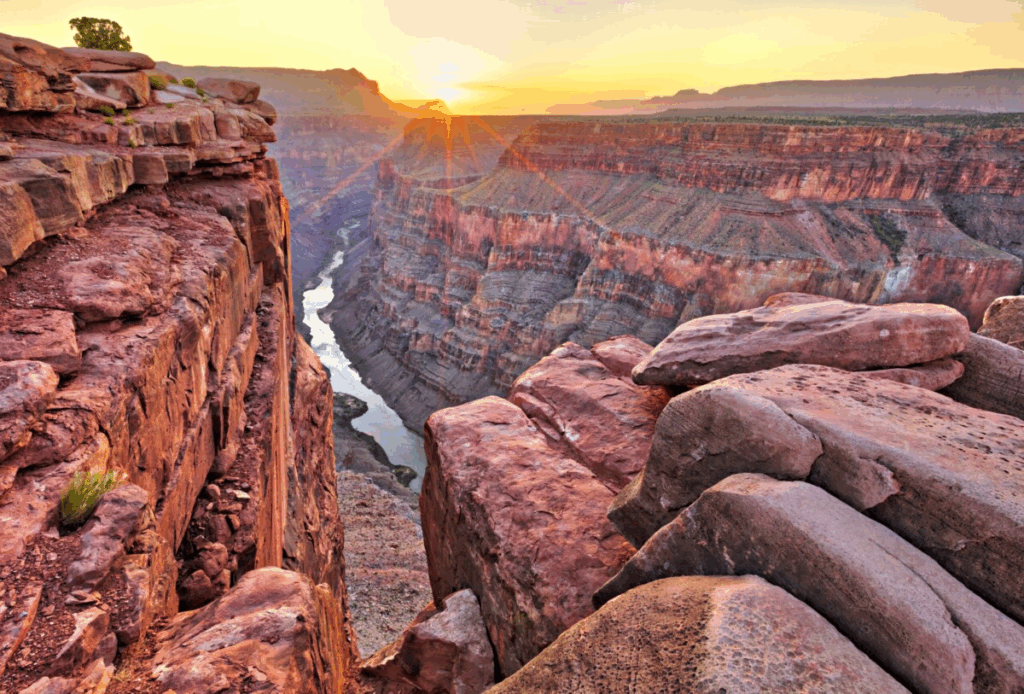
Sunrise and Sunset Hikes: Easy Trails with Maximum Reward
While many assume you need to hike deep into the canyon to enjoy sunrise or sunset, the South Rim offers amazing light shows from very accessible spots. Trails like the short segment between Powell Point and Hopi Point offer dramatic changes in light and shadow, and they remain beginner-friendly in both terrain and distance. Sunrise at Mather Point is especially popular for its unobstructed eastern exposure and flat, paved trail from the main parking area. At sunset, Yaki Point and Mohave Point become golden hour favorites—both reachable via shuttle or short walks.
Timing your easy hike for these peak light moments adds magic to your experience without requiring technical skill or stamina. Just be sure to dress in layers since desert mornings and evenings can be chilly, even in warmer months. Having a flashlight or headlamp for early or late hours is a smart idea too. For beginner hikers looking for maximum beauty with minimal effort, these times are ideal—and they often allow for moments of solitude even in high season.
Avoiding Crowds on Easy South Rim Trails
Even the most accessible trails at the Grand Canyon South Rim can become busy, particularly in summer and during major holidays. However, avoiding crowds is entirely possible if you plan your hike in the early morning or late afternoon. Most tour buses and day visitors arrive between 10 a.m. and 4 p.m., so hitting the trail before 9 a.m. or after 5 p.m. significantly increases your chances of finding quiet stretches—even on the popular Rim Trail.
Weekdays outside of peak travel seasons like spring break or midsummer are also better for solitude. Trails west of Grand Canyon Village toward Hermit’s Rest tend to be less trafficked than those near Mather Point. Planning a visit during shoulder seasons, such as late September or early November, provides a peaceful experience with cooler temperatures. If you’re interested in finding other national parks where timing makes a major difference in avoiding the crowds, check this guide on best time to avoid crowds in Yosemite.
How Elevation Affects Beginner Hikes
The South Rim sits at around 7,000 feet above sea level, which may surprise newcomers not used to higher elevations. While easy trails like the Rim Trail don’t descend into the canyon, even light exertion at elevation can feel more intense. Beginners may notice shortness of breath or fatigue sooner than expected, even on flat ground. Staying hydrated is one of the most effective ways to manage elevation impact. It also helps to start slow, take breaks often, and give your body a day to adjust if you’re coming from sea level.
Unlike steep hikes like the North Kaibab or South Kaibab Trails, which quickly descend into thinner air and require constant climbing, the easier rim-top trails give your lungs time to adapt. If you plan to graduate to more demanding hikes after getting comfortable, understanding how your body reacts at elevation is a critical part of preparation. It’s a safe way to build confidence and physical readiness without overcommitting early.
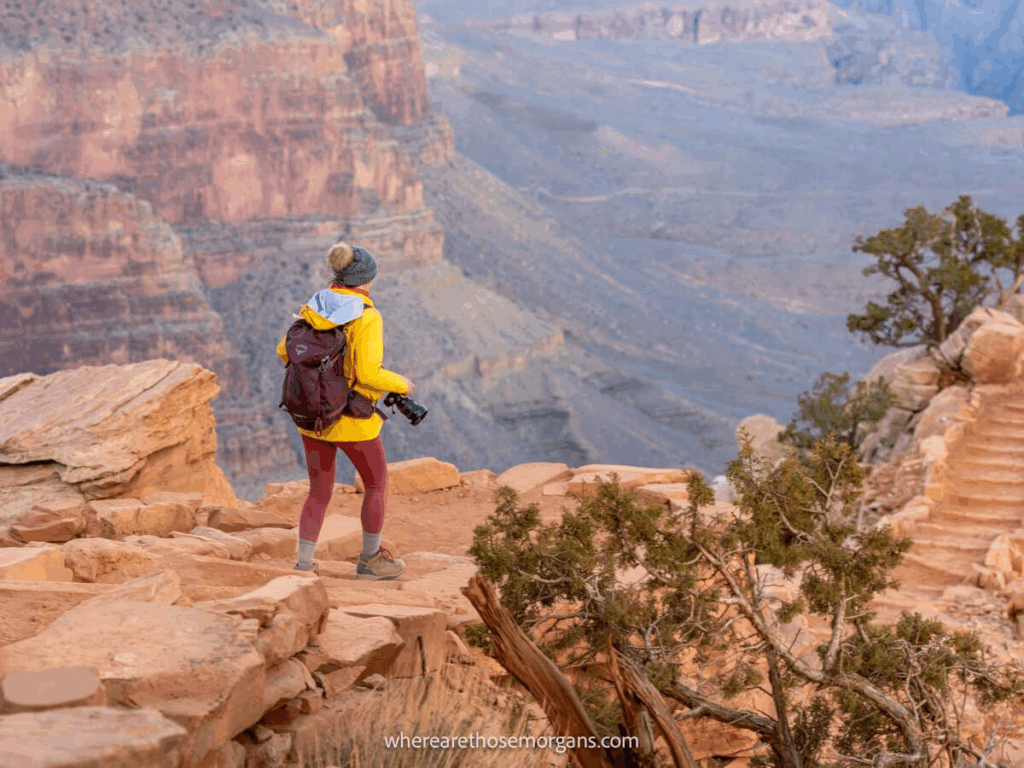
Are South Rim Easy Trails Safe for Solo Hikers?
Yes, most easy hikes at the South Rim are perfectly suitable for solo adventurers—especially along the Rim Trail. This trail is not only well-traveled and near major facilities, but also offers cell service in many sections, which is uncommon in backcountry environments. You’ll often pass rangers, other hikers, and shuttle stops, which adds layers of security. Still, it’s always wise to carry water, a small first aid kit, and tell someone your hiking plans.
Compared to more advanced trails in Zion or other parks, the South Rim trails are among the safest options for solo hiking. For example, if you’re considering tackling more intense routes in the future, you might explore resources such as is it safe to hike Angels Landing alone. That trail is far more exposed and demanding, making the Grand Canyon’s rim paths an excellent and safer way to gain hiking experience by yourself.
Where to Start: Visitor Centers and Trailhead Orientation
Your first stop before hitting the trail should be the Grand Canyon Visitor Center, located near Mather Point. Here, you’ll find maps, updated weather and trail conditions, ranger advice, and even short films that introduce you to the park’s geography and safety tips. Just behind the center begins a segment of the Rim Trail with excellent signage and gradual views opening up toward the canyon.
Other great trailhead access points include Verkamp’s Visitor Center and the Grand Canyon Railway Depot. These locations are connected by shuttles and feature restrooms, water refill stations, and shaded picnic areas—important assets for those easing into hiking. Taking time to explore these areas first gives you a better sense of scale and direction, ensuring your first hikes are smooth and confidence-building.
Combining Easy Hiking with Scenic Drives
If you’re looking for variety without physical strain, pairing short hikes with scenic drives is a fantastic way to explore the South Rim. Desert View Drive is a particularly rewarding route. It stretches 25 miles east of Grand Canyon Village and includes multiple pullouts with paved paths leading to jaw-dropping overlooks. Some stops, like Lipan Point or Navajo Point, have short trails (less than a quarter mile) that take you to quieter viewpoints away from the main road.
This method allows you to customize your day by alternating short walks with restful moments in the car. It’s perfect for visitors who may have limited mobility, are recovering from injury, or are simply easing into outdoor activity. For those interested in pairing driving and hiking in remote places, it’s similar in planning to destinations like how to get to Racetrack Playa in Death Valley, where the route itself is part of the adventure].
Accessibility and Wheelchair-Friendly Trail Options
Grand Canyon National Park has made several key trails accessible to visitors with mobility challenges. The paved portion of the Rim Trail between Mather Point and Yavapai Point is fully wheelchair-accessible and offers unobstructed views. Benches, tactile exhibits, and railings are installed frequently to make the experience inclusive and comfortable for all.
The Trail of Time exhibit also offers level paths and interpretive displays that are set at accessible heights. Shuttle buses are equipped with lifts, and several parking areas include dedicated accessible spaces near trailheads. The park provides a detailed accessibility guide online and at the visitor center to help travelers plan routes that meet their needs. These features make it possible for nearly anyone to experience the magic of the South Rim’s easy trails.
What to Pack for a Short, Easy Day Hike
Even the easiest hike requires a bit of preparation. At minimum, you should bring water—around one liter per person for every 2–3 miles—even if you’re sticking to the Rim Trail. Sun protection is also essential, since shade is limited along the canyon edge. A brimmed hat, sunglasses, and sunscreen go a long way toward keeping you comfortable.
Light snacks such as trail mix, fruit, or energy bars help maintain energy, especially when walking in warm weather. A small daypack, layered clothing, and a basic first-aid kit are also good ideas, particularly if you’re hiking with children or older companions. Unlike backcountry hikes, easy Rim trails don’t require technical gear, but being prepared ensures that your time remains enjoyable and stress-free.
Why Start with Easy Trails Before Exploring Deeper
Beginning with short, accessible trails gives new hikers time to acclimate to both elevation and environment. It’s tempting to jump into a deeper canyon hike, but even descending just a mile on a steeper trail means a challenging uphill return. Easy Rim hikes allow you to enjoy stunning views, gain confidence, and understand trail etiquette without overexertion.
These experiences also help you recognize what types of hiking you enjoy—do you prefer frequent views or more secluded areas? Gradually increasing your trail difficulty is a safer, more enjoyable approach to hiking, especially in a place as vast as the Grand Canyon. It also helps you better prepare for more strenuous hikes in the future, such as in Zion or Yosemite.
Frequently Asked Questions (FAQ)
Is a permit required for day hikes on the South Rim?
No permit is required for day hiking along the Rim Trail or any of the other beginner-friendly routes along the South Rim. Permits are only necessary for overnight trips into the canyon or camping in backcountry zones.
Are pets allowed on South Rim trails?
Leashed pets are allowed on the paved Rim Trail but not on trails that go into the canyon, such as the Bright Angel or South Kaibab Trails. Always carry water for your pet and clean up after them.
Can I use a stroller on the easy trails?
Yes, many parts of the paved Rim Trail and the Greenway Trail are stroller-friendly, especially those starting from Mather Point or the Visitor Center area.
Is there cell service on the Rim Trail?
Most sections near the Grand Canyon Village and Visitor Center have decent cell service, but coverage becomes weaker toward Hermit’s Rest and Desert View. It’s always best to download offline maps before heading out.
How long should I plan for an easy Rim Trail walk?
It depends on your pace and where you begin. A short round-trip walk between Mather Point and Yavapai Point takes about 30–60 minutes at a relaxed pace.
Is the Rim Trail shaded?
Shade is limited, particularly during mid-day. While some trees and shelter structures exist near buildings, most of the trail is exposed to sun.
Are there food options near the easy trail areas?
Yes. The Grand Canyon Village has multiple dining options, including snack shops and restaurants within walking distance of the Rim Trail.
Do the shuttle buses run year-round?
The free shuttle system operates throughout the year, but routes and frequency may change seasonally. Always check the current schedule at the Visitor Center.
Can I bike along the same routes as the Rim Trail?
Bikes are allowed on the Greenway Trail but not on the pedestrian-only sections of the Rim Trail. There are bike rentals available near the visitor center.
What shoes should I wear for an easy hike?
Comfortable walking or trail shoes with a solid grip are ideal. You don’t need heavy-duty hiking boots for these beginner trails.
What happens if I feel dizzy or short of breath?
Take a break immediately, sit in the shade, hydrate, and don’t hesitate to ask nearby visitors or rangers for help. The elevation can affect people unexpectedly.
Can I bring a picnic on the trail?
Absolutely. Several scenic spots along the Rim Trail have benches or rock ledges that make for a perfect picnic stop. Just be sure to pack out all trash.
What if I want to hike into the canyon later on?
That’s a great goal. Start with the Rim Trail to condition yourself, then try short descents like the 1.5-mile Resthouse on the Bright Angel Trail before going farther.
Is it better to hike early or later in the day?
Early morning is generally better—cooler temperatures, softer light, and fewer people. Evening hikes also work well, especially in summer.
Can I combine hiking with a visit to the IMAX or other attractions?
Yes. The IMAX theater in Tusayan is a short drive from the South Rim and fits easily into a half-day visit. You can also visit museums like Yavapai Geology Museum right along the Rim Trail.


Post Comment